
Setup Your Project
Tell Lupe about your business, sites and ad platforms in five short steps, so our team can set up your first-party data.
Adding a project in Lupe tells us which sites, platforms and traffic levels we are setting up first-party data for. You complete five steps. Our team completes the last two.
- Add your project info, domains and platforms
- Add your Google Tag Manager containers, if you have them
- Estimate your monthly visitors and submit
- Check through your entries & support your setup
- Handle the setup of your data server & sGTM container
- Test that the new connections work correctly
Before you start
- You have set up your Lupe account.
- You know the name, billing address and contact details of the business, brand or artist the project is for.
- You have a list of every website, store and landing page you run.
- You know which analytics, consent and ad platforms you use. If you can, have their IDs to hand.
Your steps
Click + Add Project to begin. The seven steps are listed on the left of the screen. You can go back to any step before you submit. Fields marked with a red star are required.
Add your project info
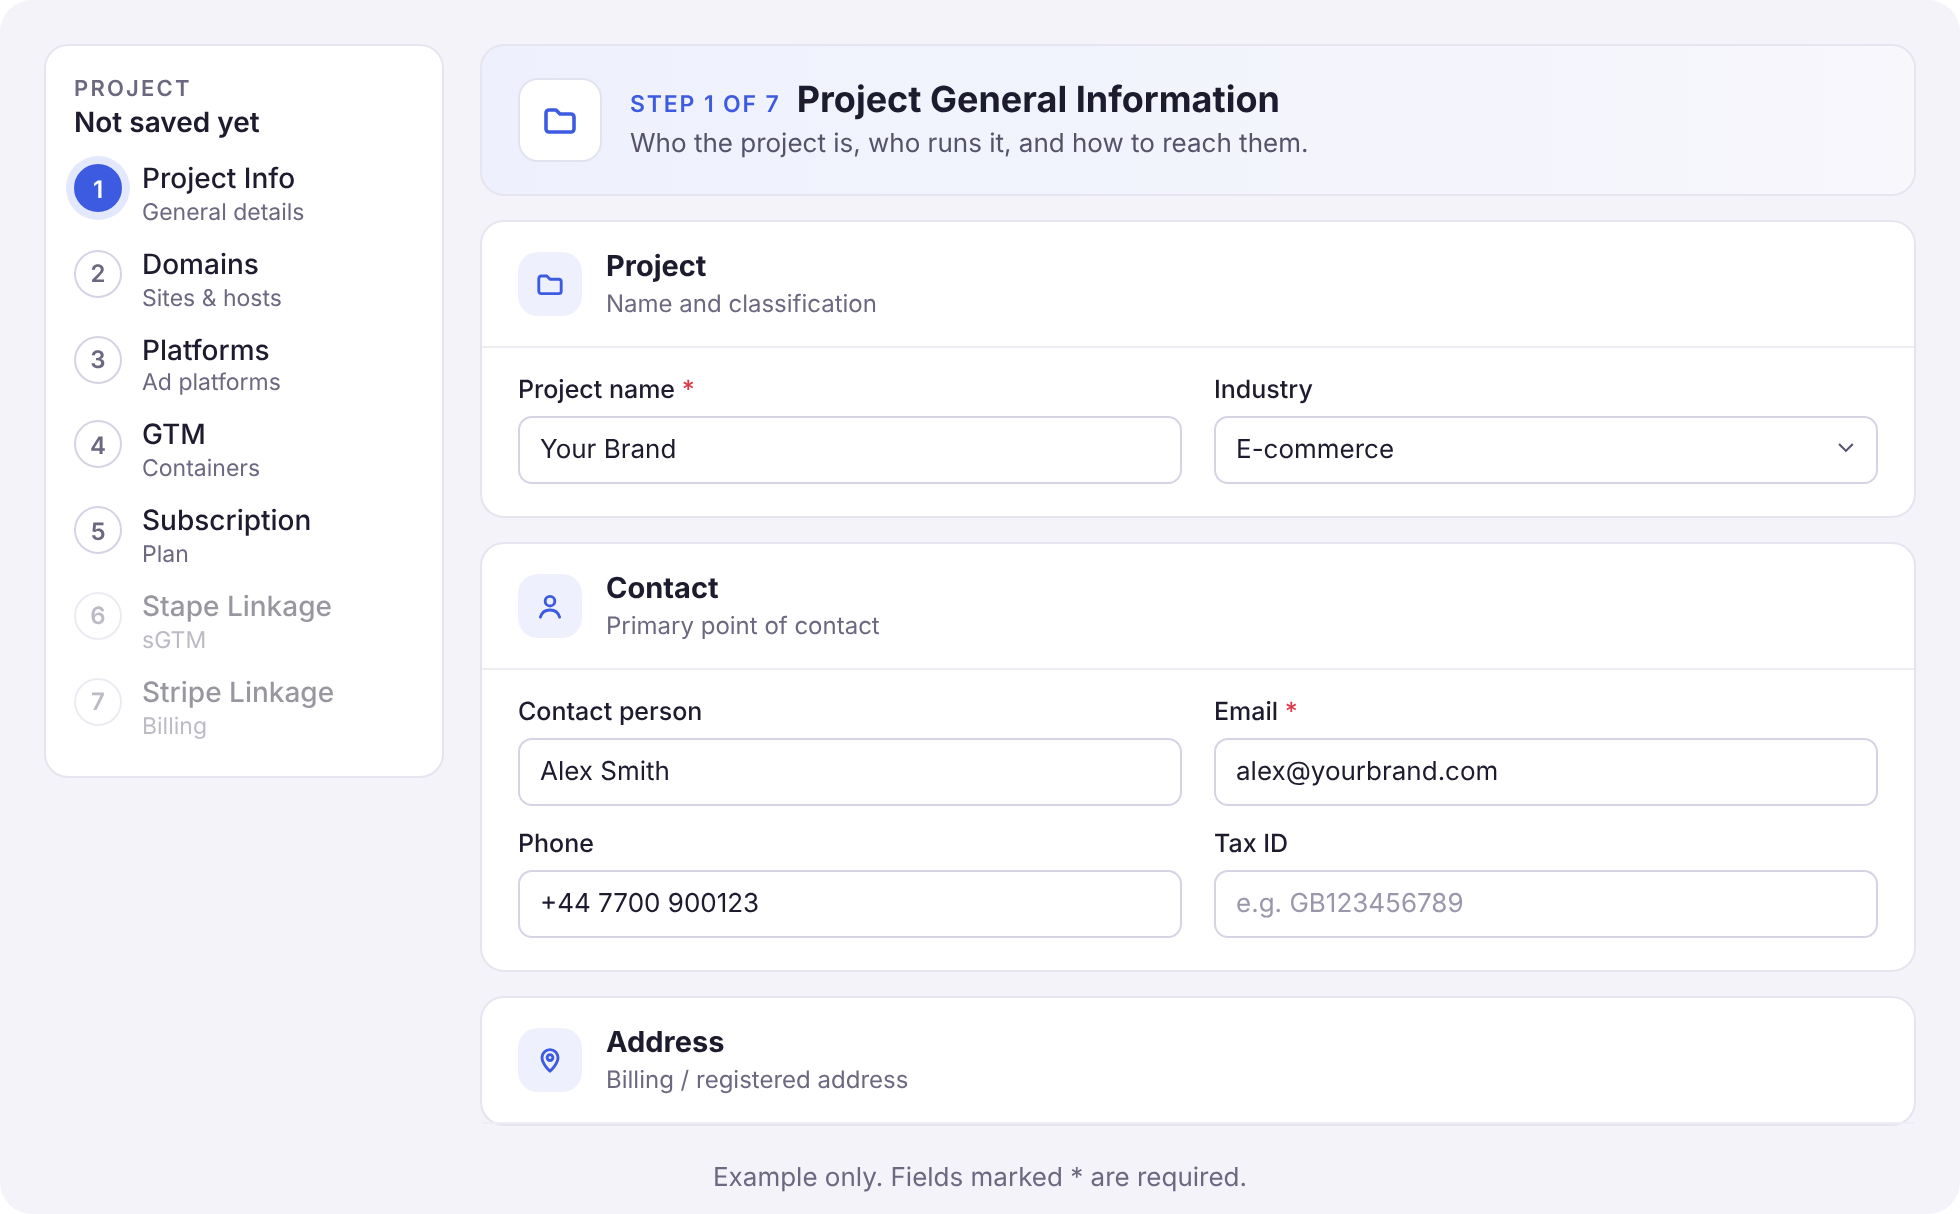
Add the details of the business, brand or artist the project is for:
- Project name: the name you are most commonly known by.
- Industry: the closest match to what you do.
- Contact: the person who looks after the project, with their email and phone number.
- Address: the billing or registered address of the business that represents the project.
You can also add a profile picture (PNG, JPEG or WebP).
Add your domains
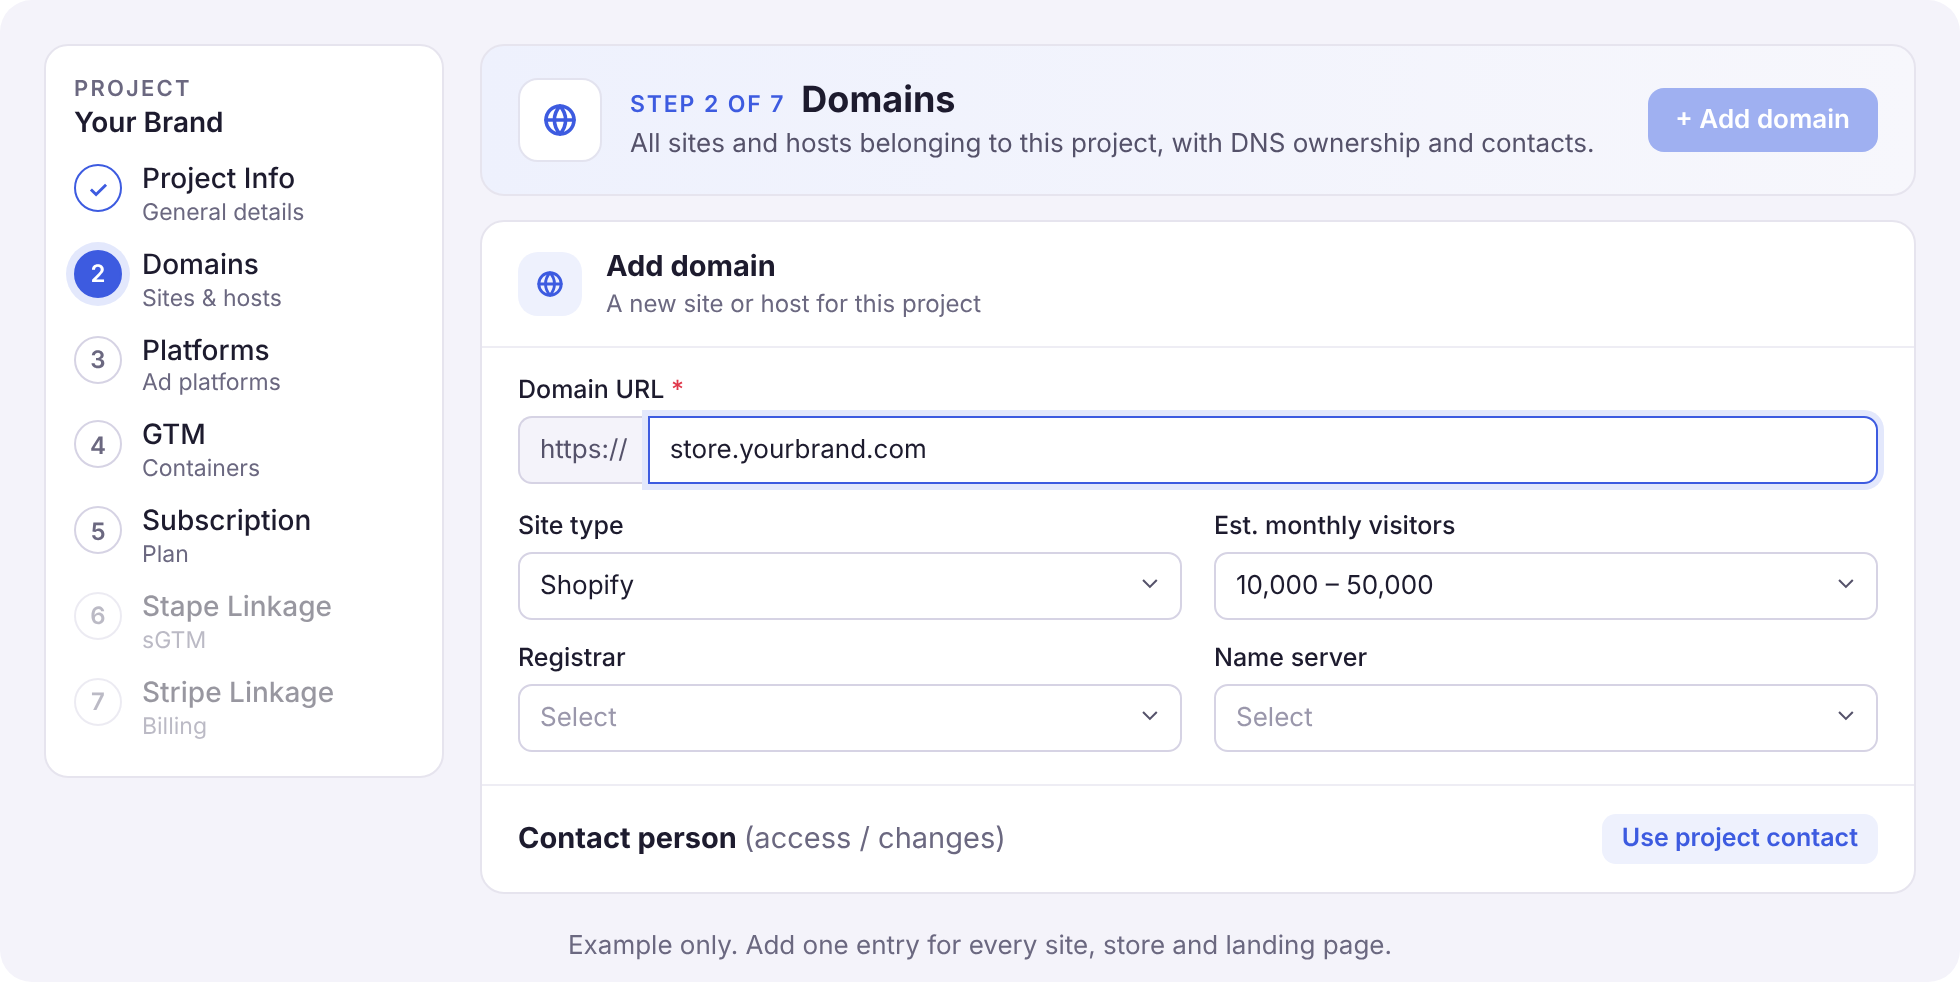
Click + Add domain and add every website and host that belongs to this project. Add one entry for every site, store and landing page. For each one, choose:
- the Site type
- an estimate of Est. monthly visitors
- the Registrar and Name server
- a Contact person for DNS access or changes. Use project contact copies the contact from step 1.
Registrar is where you bought and renew your domain. Name server is where your DNS records are managed. This is often the same company, but not always. Not sure? Leave them blank and add a note in Comments, for example who to contact for DNS access.
Think about every site you run. Most businesses have more than one. Check for:
- Subdomains, such as
store.yourbrand.comortry.yourbrand.com - Stores, including Shopify stores
- Websites and blogs
- Landing pages and campaign sites
- Link-in-bio and pre-save pages, such as Linktree or ToneDen
- Web apps, games and other experiences
Is every site under your own root domain? First-party data works best when every site sits under your own domain, for example store.yourbrand.com rather than yourbrand.myshopify.com. Shopify stores often still use a myshopify.com address. Link-in-bio and pre-save pages often sit on the provider's own domain. Add them anyway and tell your onboarding manager. Where the platform allows it, we will help you move them under your root domain, such as links.yourbrand.com.
Add your platforms
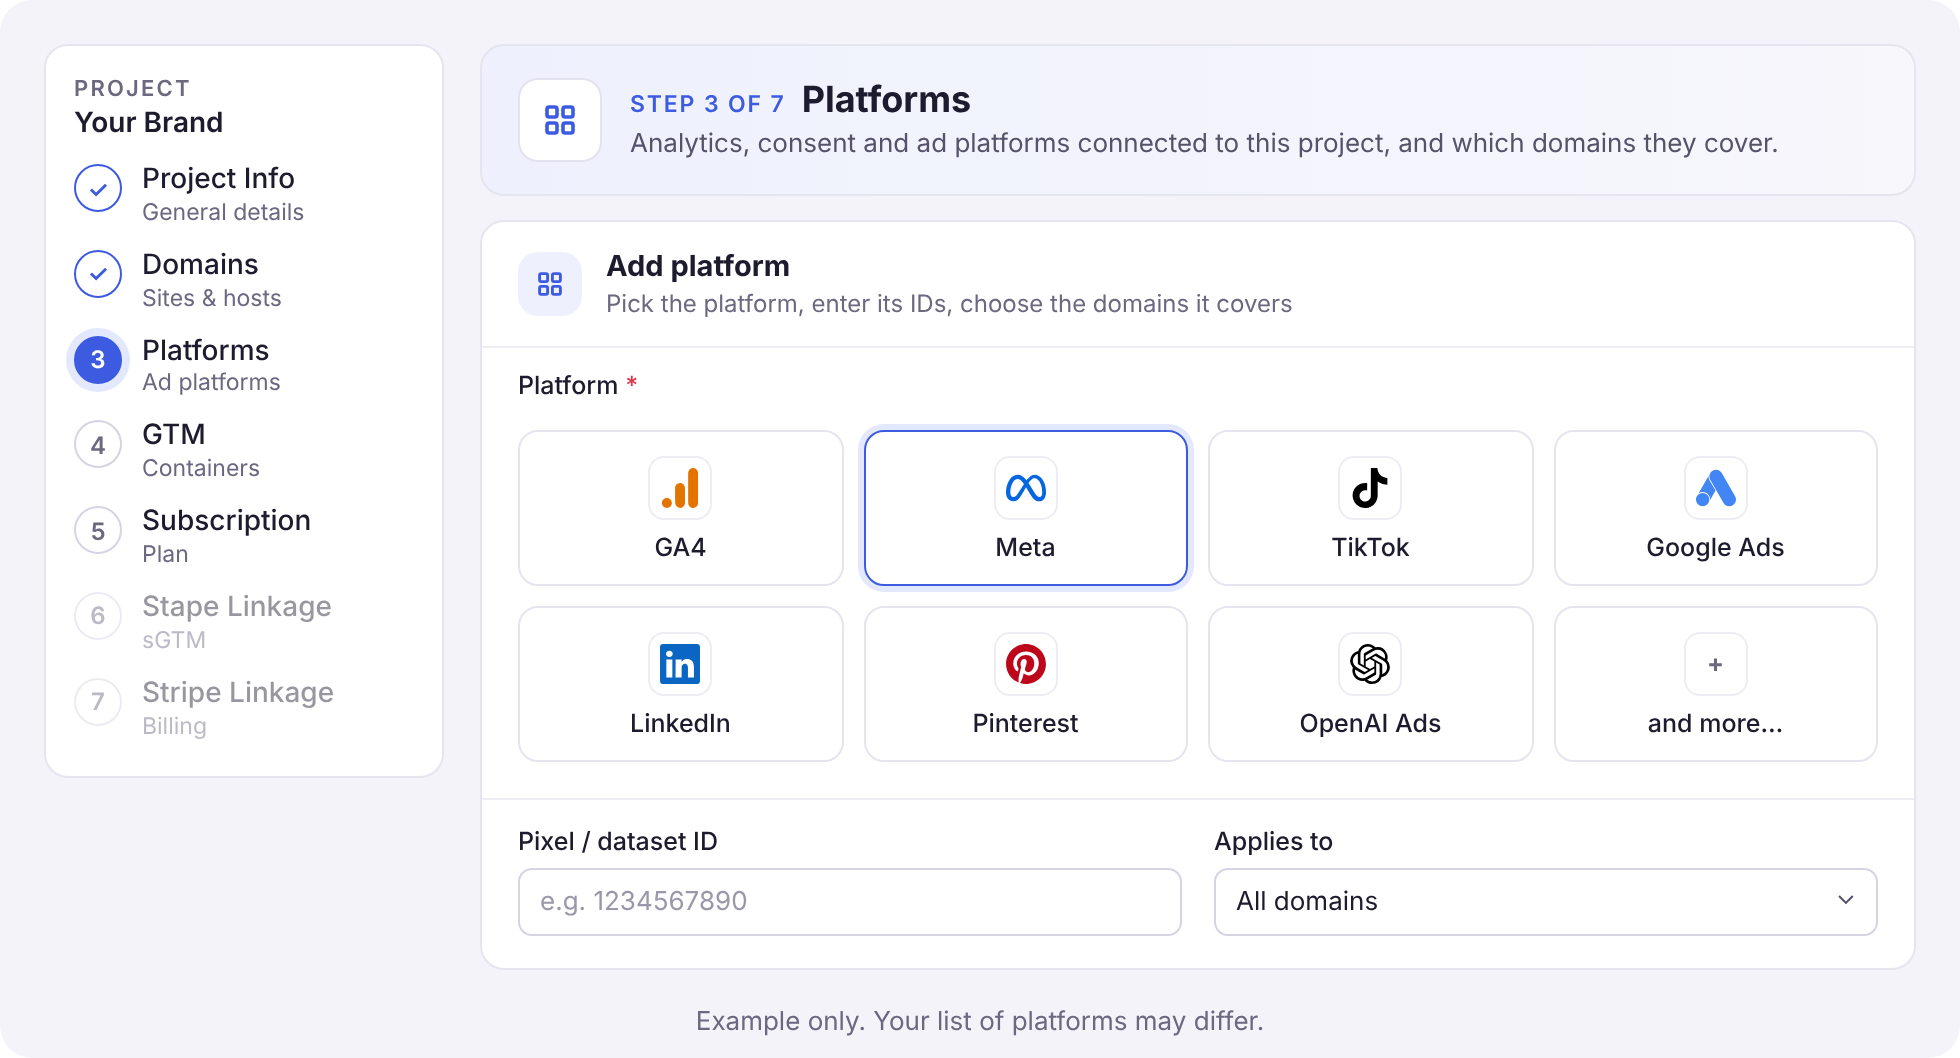
Pick each analytics, consent and ad platform you use, and enter as much information as you can:
- Platform: for example GA4, Meta, TikTok, Google Ads, LinkedIn, Pinterest or OpenAI Ads. Your list may differ.
- IDs: for example your Meta dataset (pixel) ID, TikTok pixel ID or GA4 measurement ID.
- Owner: who owns the account.
- Applies to: All domains covers every domain in the project, including any you add later. Choose selected domains if a platform only covers some of your sites.
Think about every platform you run, and whether you would like any of them set up for you.
Can't find an ID? Fill in what you can and leave the rest blank. Your onboarding manager checks everything. Each platform guide shows where to find what we need:
- Meta dataset access: your dataset name and ID
- TikTok pixel access: your pixel name and ID
- Google Analytics 4 access: your property name and ID
- Google Ads setup: your conversion ID and label
- LinkedIn, Pinterest and ChatGPT ads (OpenAI): your ad account name and ID
You don't need to create Conversions API keys or access tokens. Our team generates these during setup, once you have given us access.
Add your GTM containers (optional)
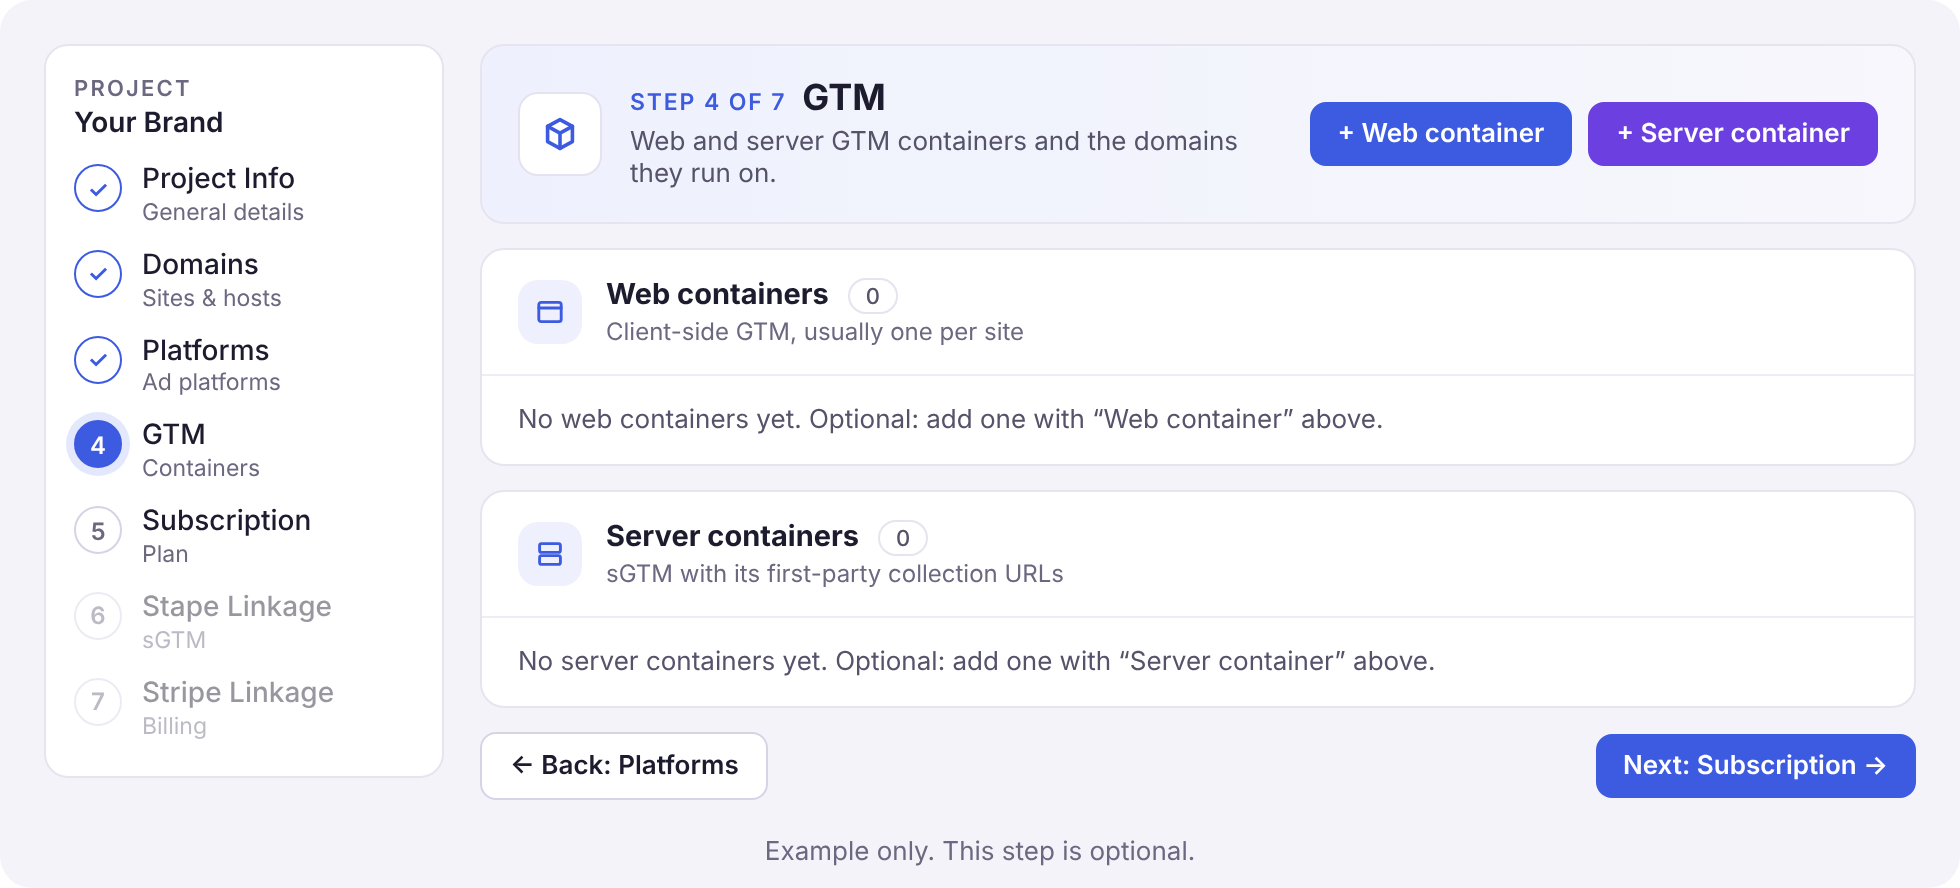
If you already use Google Tag Manager and have admin access to your containers:
- Click + Web container and add each web container. IDs start with
GTM-. - Click + Server container and add any server containers you already have.
- Add the domains each container runs on.
This step is optional. If you don't use Google Tag Manager, or you are not sure which containers you have, click Next: Subscription and ask your onboarding manager.
Estimate your visitors and submit
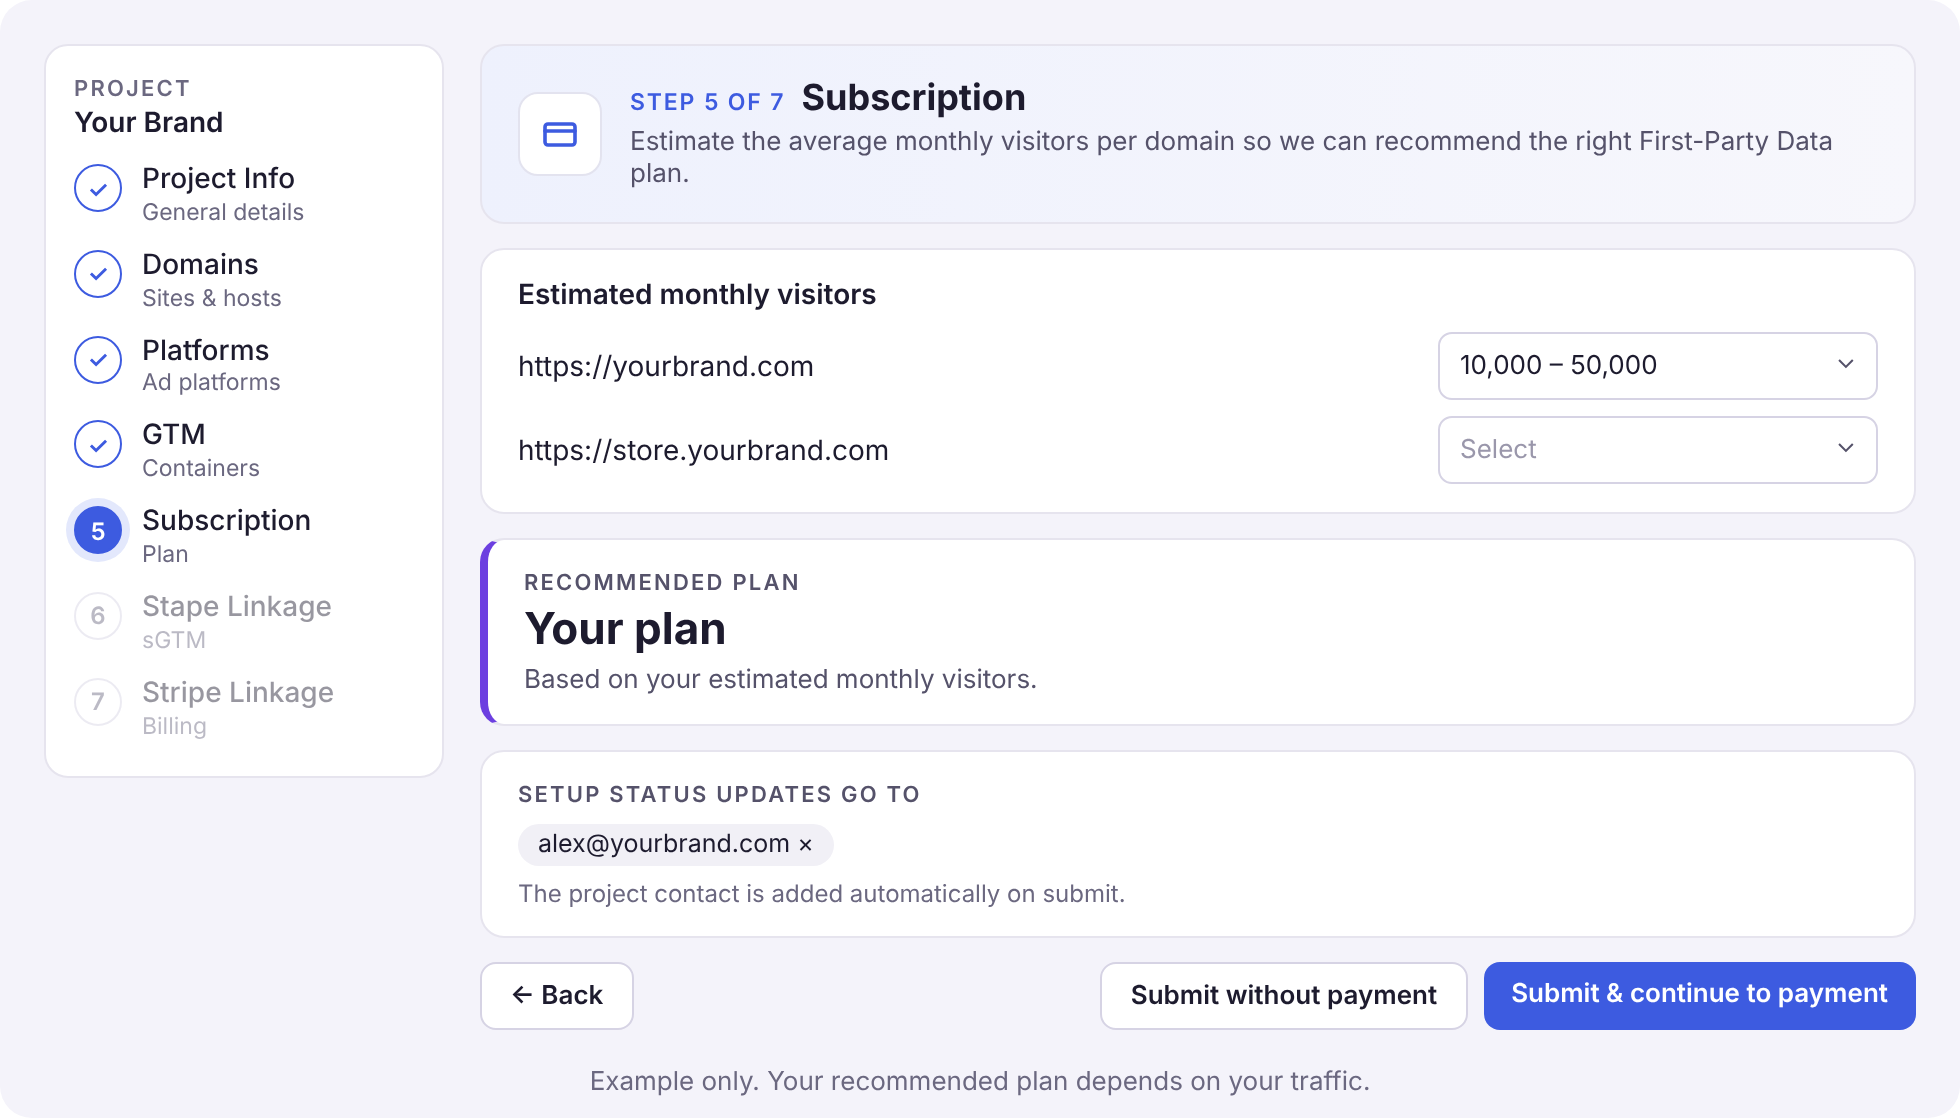
- Choose the estimated monthly visitors for each domain. Lupe recommends a plan based on these numbers, because traffic sets the demand on your data server. Leave a domain on Select if you are not sure.
- Under Setup status updates go to, add anyone else who should get setup updates by email. The project contact is added automatically.
- Choose how to submit: - Submit without payment: for a brand new project that you would like your onboarding manager to check first. - Submit & continue to payment: once your onboarding manager has given you the green light and you are ready to go live.
Stape Linkage (step 6)
Our team links your project to its server-side container on Stape. This runs your first-party endpoint, for example data.yourbrand.com.
Stripe Linkage (step 7)
Our team links your subscription and billing, which are handled securely by Stripe. Your project then shows its plan and payment status in Lupe.
What happens next
- Your onboarding manager reviews the information you submitted and contacts you if anything is missing.
- Our team completes the Stape and Stripe linkage steps.
- When both are complete, your onboarding manager tells you which platform access guides to follow next.
- Our team generates any Conversions API keys and access tokens during setup, once you have given us access.
Good to know
- You can go back to any step before you submit.
- Not sure about an ID, registrar or visitor estimate? Leave it blank. Your onboarding manager checks everything you enter.
- Billing is handled securely by Stripe.